Though the design process may have similar structure among designers, there are small nuances that make everyone’s design process unique. Some may go straight into sketches whereas others may begin by brainstorming. Regardless, it is important for all designers to somehow record their design process for each project. This can be helpful if the designer needs to go back to an earlier step in their process or for later explaining their process as part of a portfolio project.
In this post, I will describe my own personal design progress and the documentation of it along the way. However, the design process can vary from project to project, so I will use my packaging project from last semester, Divine Dough, as an example.
Divine Dough Design Process & Documentation
Project Introduction
When first assigned a project, I like to begin by thoroughly reading the project sheet to best understand the given task. In the case of client work, I would begin with a first initial client meeting, to conversate with the client on their needs and desires for the specific project. In the case of a client meeting, I would also keep a written document of matters discussed at said meeting, for future reference. In the case of Divine Dough, I began by looking over the assignment sheet and asking my professor any questions in regards to the project.
Research
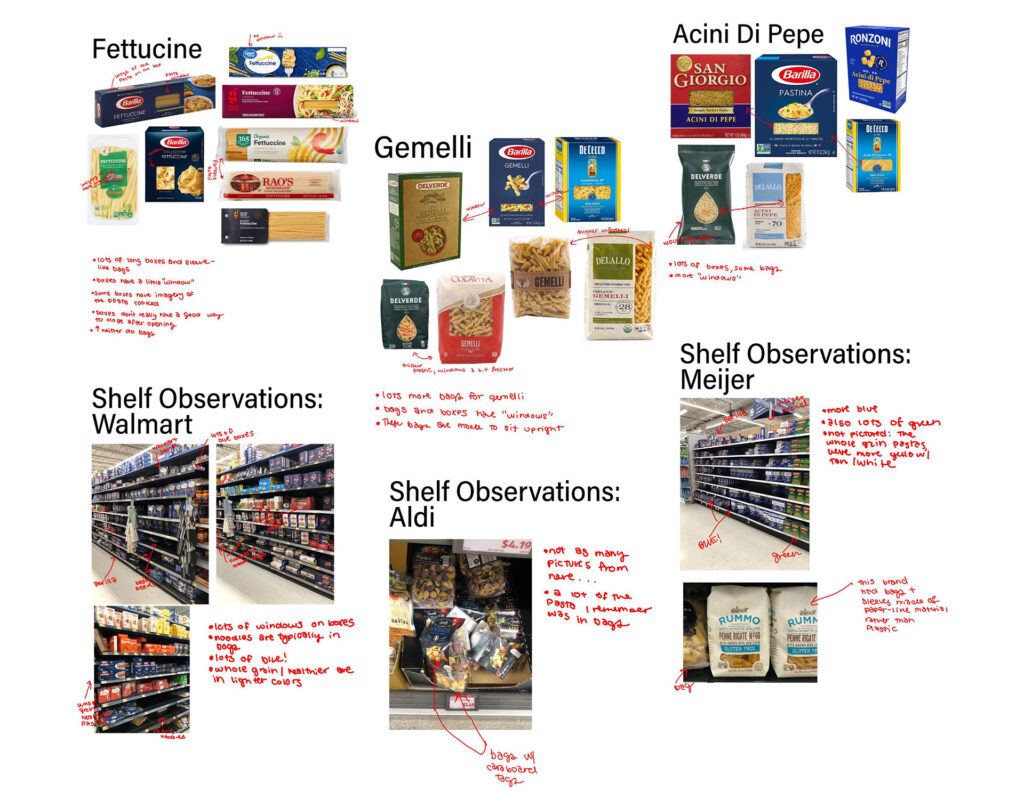
After getting a scope of the project’s requirements and needs, I began by conducting research. The type of research conducted varies from project to project. The research done for a banking mobile app would be very different from the research done for a cereal brand. In the case of Divine Dough, I began by researching pasta in general. Since the project was to create the brand of and packaging for a pasta brand, I began by researching how pasta is currently packaged and branded. To do this, I went to numerous grocery stores, took pictures, and wrote notes about the packaging, branding, and overall pasta purchasing experience.
The documentation of this research consisted of a PDF file that contained all my images, notes and thoughts of my pasta shopping experience, as well as any discoveries I made during my research. Documenting your research process can be very handy for all upcoming stages of the design process, as a lot of your future design decisions for the project will be influenced by your discoveries.
Idea Development
After having a thorough idea of how pasta is typically branded and packaged, I went into the idea development stage. For me, the idea development stage consists of generating many different ideas of a concept for the project. In the case of Divine Dough, this consisted of coming up with a brand direction and possible brand name ideas for the pasta brand. Since I originally wanted to create a pasta brand geared more towards kids, I started thinking of typical interests of children. One idea led to another and I eventually came up with the idea of a pasta brand inspired by the 12 Olympians of Greek mythology, hence the name Divine Dough.
The documentation for this consisted of saving every idea I wrote down in the order they were created. For Divine Dough, this idea generation was just done on a digital note-taking program, so I simply was sure to save the file to my project folder.
Collecting Inspiration
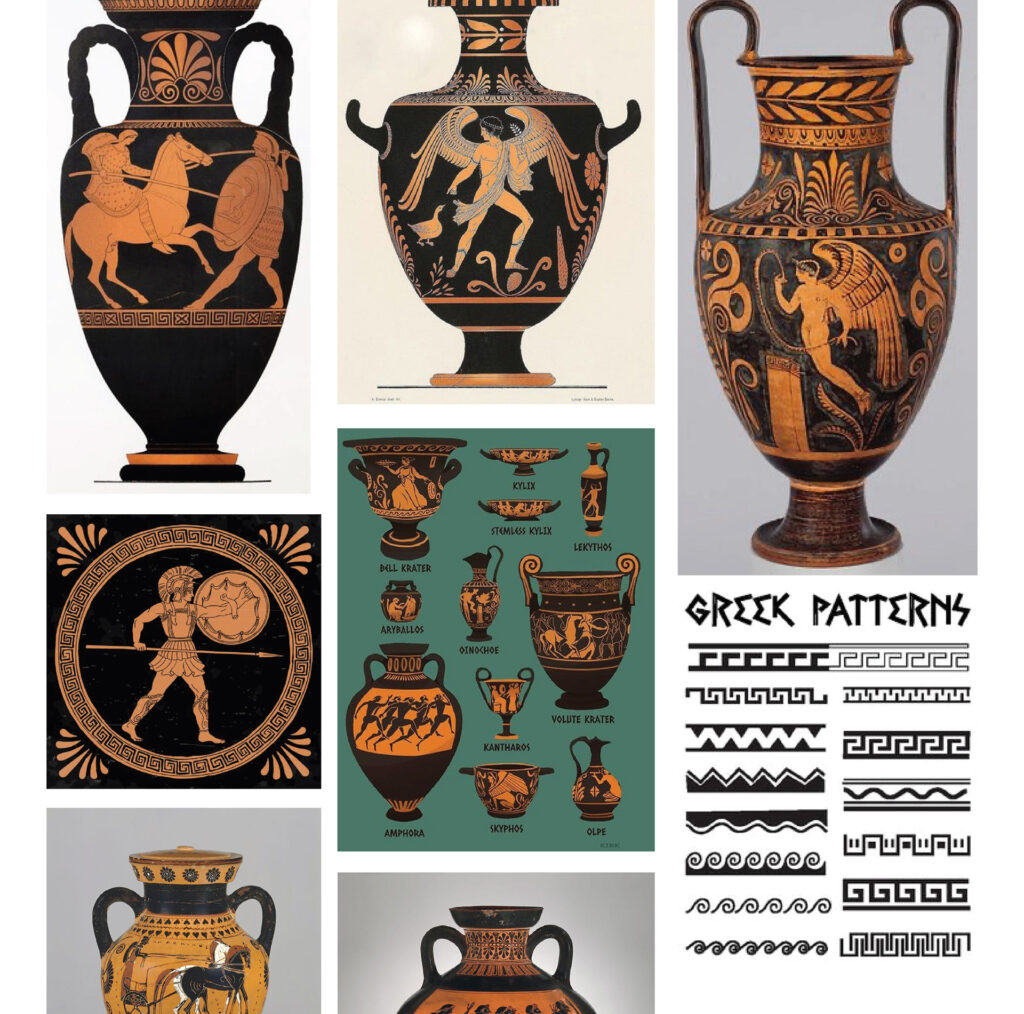
After having a solid idea of creating a pasta brand for the 12 Olympians, I conducted additional research and gained visual inspiration on the topic. This consisted of researching information on the 12 Olympians and ancient Greek mythology and visual characteristics. This led me to re-discover ancient Greek ceramics, which both have a striking visual appearance and were used to tell a storytelling device. Since the Divine Dough brand was inspired by the Olympians, which provide a plethora of stories and mythologies, these ceramics seemed to be a great area of inspiration for the Divine Dough packaging design.
Documenting this section of my design process largely consisted of creating mood boards of my inspiration. These mood boards allowed me to have a reference to look back to in a later step of my design process.
Further Brand Development
After having a more solid idea of what I wanted the Divine Dough brand to look and feel like, I went into creating an actual brand brief. The brand brief covered important brand aspects, such as its mission and vision, tone, and value to customers. I documented this using a design brief document, which covered both the aspects of the brand as well as the aspects and goals of the project.
Sketches

After formulating my idea and establishing a brand, the next steps of my process are much more straightforward. My next step involved creating sketches for the packaging design for the Divine Dough pasta packaging. This consisted of sketching the ideas for the packaging shape as well as the visual design. The documentation of this part of the process was simply keeping all the sketches I made for the packaging design and adding them to my project folder.
Creating Dies
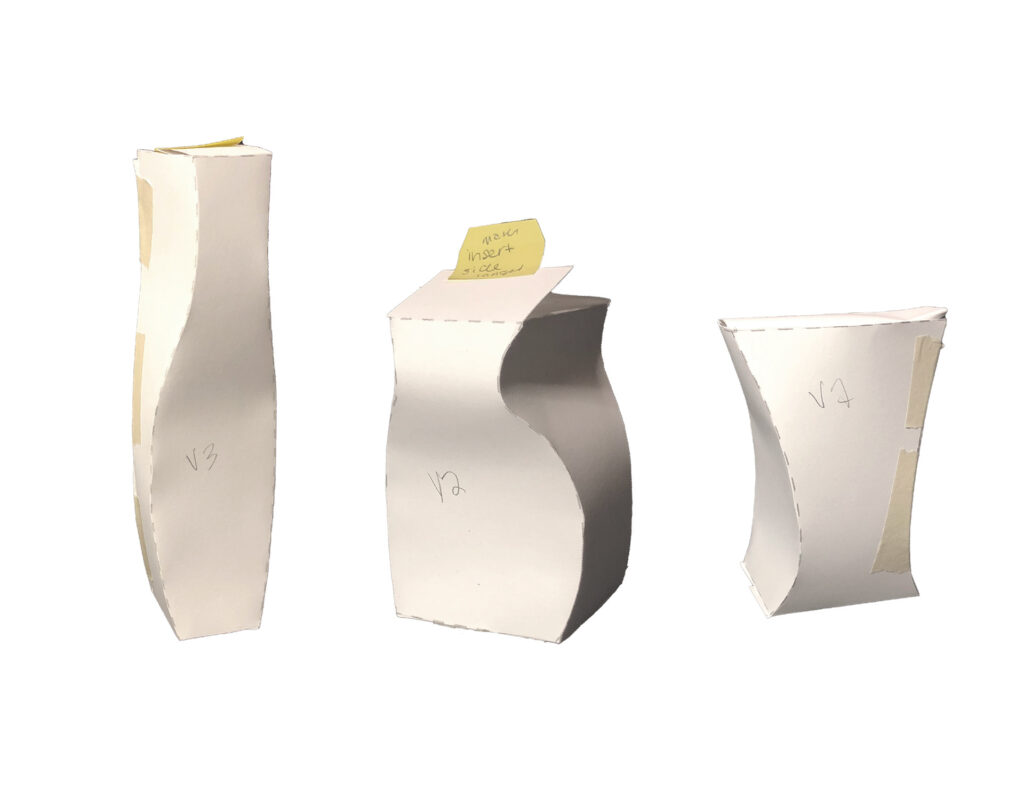
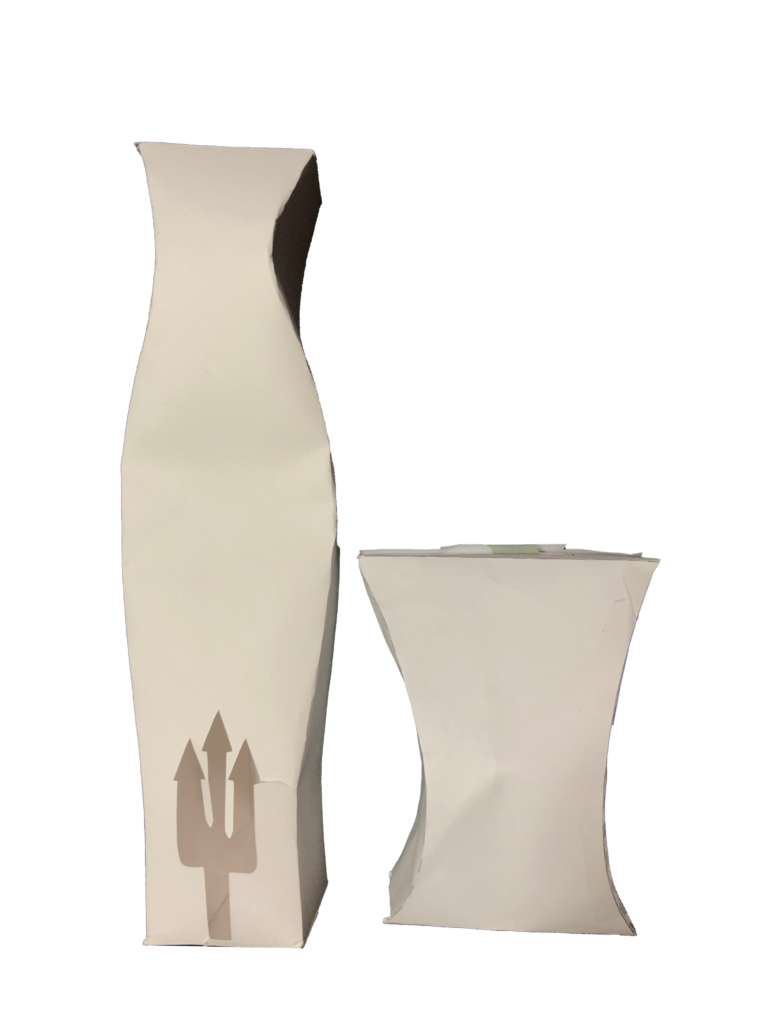
The next step was to create and test dies for the pasta packaging. This was a step that took lots of trial and error but provided a lot of process material. In this step, I simply created the dies for the packaging in Illustrator, and tested if they looked how I wanted by creating physical prototypes. This involved a lot of adjusting the dies, and creating the prototypes till I had dies that I liked best.
The documentation of this process was a very valuable step. Through my process, I kept all previous die designs by duplicating the die before creating alterations. This allowed me to go back to old die designs if I needed to and to have a nice evolution of my process to look back on. Additionally, I also kept and photographed all my physical die prototypes.
Packaging Design
After creating dies I was happy with, I began by designing the visual design of the packaging. As for the actual visual designing, I followed the sketches I made in a previous step. This documentation process was similar to the process of creating the dies. After making an initial design, I was sure to duplicate the file before making any large alterations, so I would always have something to go back to if needed. This process continued until I had a design I was happy with.
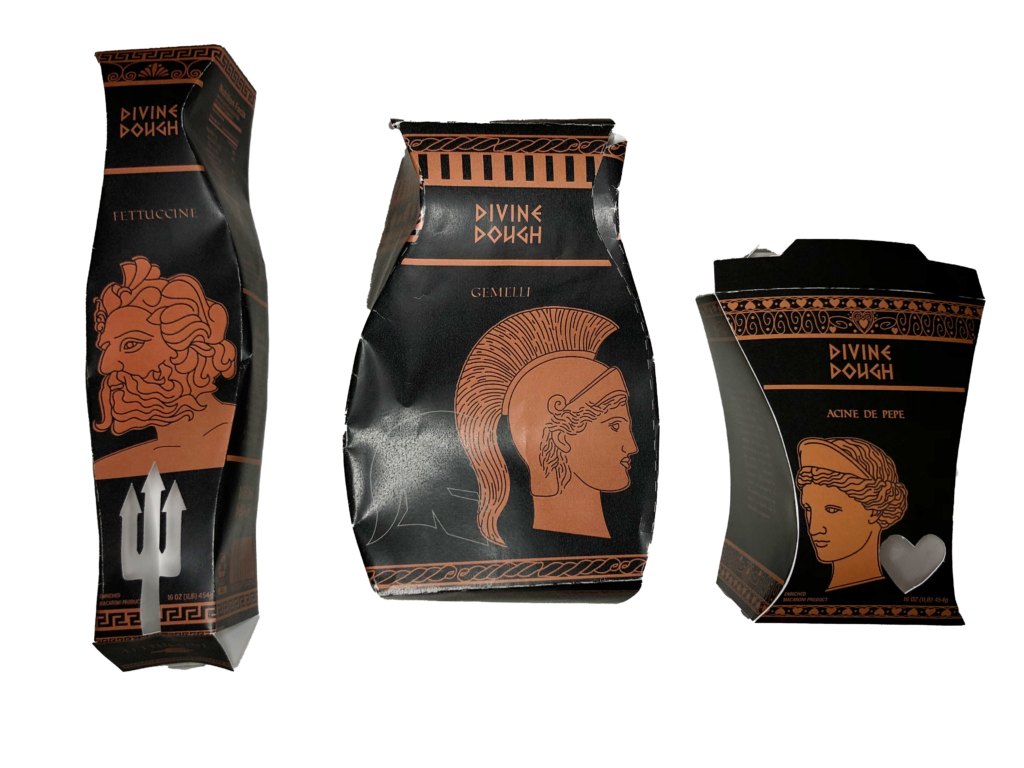
Final Prototype & Product
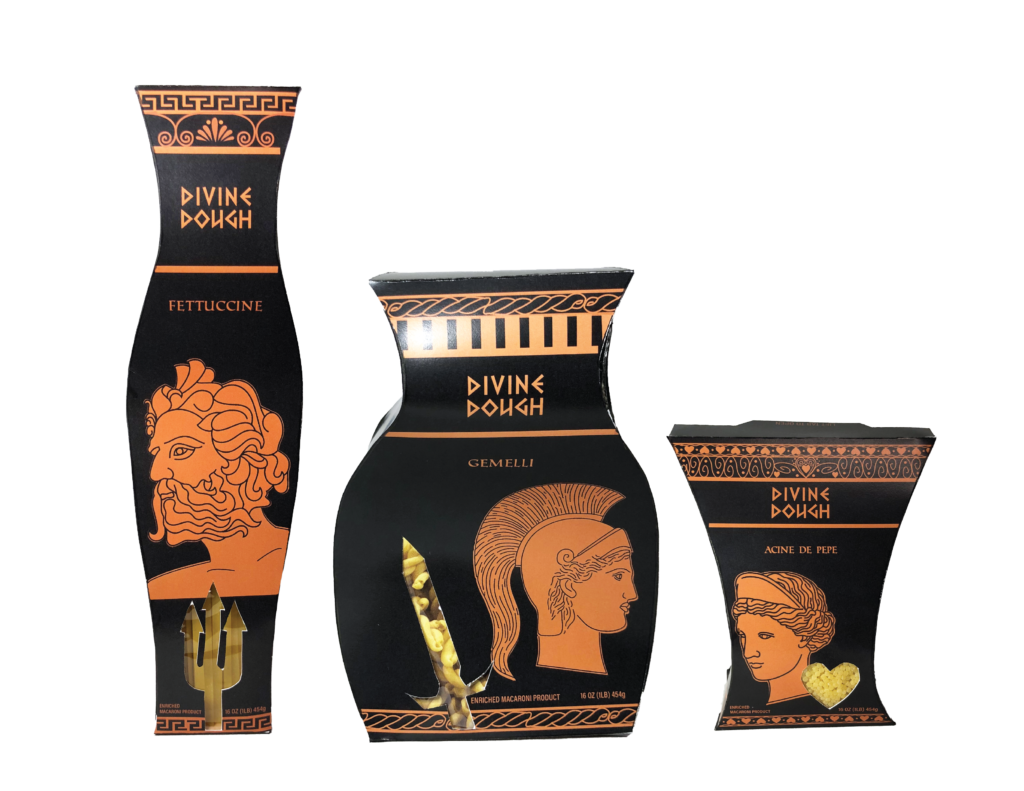
After having what I would turn into my final design, I created one final prototype. This prototype would be my closest prototype to my final version, and is created as a way to check the final design. During this check, I aimed to make sure everything is perfect before producing my final packaging product.
I then went on to actually produce the packaging. This consisted of printing the design with the die on a desired material, cutting and assembling. And like that, I had my final packaging product.
Design Process Documentation Summarized
Everyone’s design process can look slightly different, which leads to everyone’s documentation process also looking slightly different. Below is a list of the steps of my personal design process as well as the documentation that takes place in each step:
- Understanding project overview: Take notes and ask questions during assignment briefs. During client meetings, also take notes and ask questions, fully understanding the project.
- Research: Document your own research as well as sources used. Keep a file in your project folder containing all research obtained for the project.
- Idea generation: Document your idea generation process. This can consist of keeping the sketches and images that lead you to formulate and evolve your idea.
- Inspiration: Save your inspiration! Saving your inspiration can consist of saving the mood boards you created or saving the images that inspired you.
- Sketching: Save your sketches. Sketches help serve as a reference when designing and can be helpful in telling your design process later on.
- Designing and prototyping: The designing and prototyping process go hand in hand. Often-times when designing you will create prototypes of your design, then go back to tweak the design. During this, save all the past versions of both designs and prototypes. They help to give you reference of your past designs and provide good process material.
- Final checks: On a final prototype, check that everything is as it should be. Is everything spelled correctly? Are there any extra lines or imperfections? An easy way to document this is by creating a checklist of everything that should be checked in the final prototype.
The steps you follow in documenting your design process is all dependent on how your own design process rolls. However, there are a few tips that everyone can follow to make your process documentation smoother and easier to understand.
- Keep an organized folder. Have a folder for the project and keep it organized and have subfolders for each step in the design process. Date each file for your own reference.
- Don’t delete anything! Don’t delete anything throughout yor process. Even if you don’t use an earlier version of a design or really hated an earlier version, the earlier versions help to tell the story of how you came to create your final product.
The design process can be different to everyone. However, documentation of this process is helpful regardless. Though it may feel tedious to be documenting every step of your design process, it can be very helpful for you later in the project and in the future when describing your process. You may not remember details of your design process that seem small at the time, but could be a big help later on.
So, be sure to document your design process, future you will be thankful!